Hi everyone! I hope that you had a wonderful Thanksgiving. Speaking of thanks, I created this CAS thank you card to give to a friend of mine for a birthday gift that I recently received.
I used one of my fave sets from Sweet N Sassy stamps called Wildflowers (I used it on my last post too lol). I took an acrylic block, inked it up 3 different timees before I stamped it on my paper so it created blotchy rectangles. I then stamped the flowers over the top of the 3 rectangles with black ink.
Supplies:
stamps- SNSS Wildflowers and Many Thanks (sentiment)
ink- SU coral, baja, and celery
accessories- rhinestones, scallop border punch, foam tape, acrylic block
Thank you for spending a part of your day with me! Have a wonderful rest of the day!
All blog content, including designs, text, and photographs are COPYRIGHT © Janette Olen. Everything posted here is shared for your personal inspiration and enjoyment only and may not be used for publication or for design team submissions. Thanks so much for stopping by!
Monday, November 28, 2011
Thursday, November 17, 2011
Coral Wildflowers
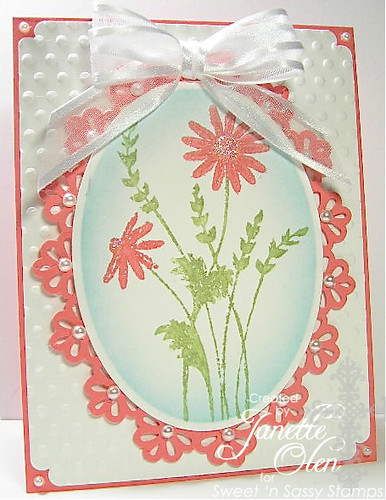
I have an all occasion card to share with you today. I made this it for the color challenge on SCS this week which was coral, limeade and baja breeze. The beautiful flower image is from the Wildflowers set from Sweet N Sassy stamps. I colored directly on the stamp with Stampin Up markers before stamping the image. Stickles was used on the center of the flowers. I created the decorative frame around the oval by using a Martha Stewart border punch. You can see directions on how to do this HERE.
Supplies:
stamps- SNSS Wildflowes
CS- cameo coral, white
accessories- stickles, pearls, MS border punch, cuttlebug polka dot folder, scallop corner punch, white organdy ribbon
Tuesday, November 15, 2011
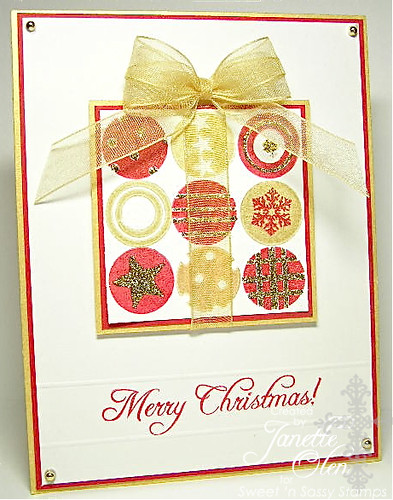
Christmas Present
I have pretty limited craft budget so I really enjoy getting the most out of my supplies and using them in new ways. For the card I am sharing with you today, I used an all occasion everyday stamp set to create a Christmas card. I was inspired by a Christmas ad that I recently saw and that is where the idea for my card came from.
I stamped several different images from Sweet N Sassy stamps Seeing Spots set in both red and gold inks to make a square. I then matted it and used some organdy ribbon to make it look like a present. The card was further embellished with gold stickles and gold pearls in the corners. I "framed" the sentiment by placing it between 2 score lines. I was fairly happy with how this card came out and I am planning on making more in some different color combos.
Supplies
stamps- Seeing Spots from SNSS
Cardstock- Gold Sparkle, Blanc Sparkle and red from Paper Temptress
embellishments- gold pearls, gold stickles, gold organdy ribbon, and scor-pal
Tis the season for holiday shopping! This week's birthday special at Sweet N Sassy stamps is Buy a $25 gift certificate and get a $5 gift certificate for yourself. Now that is my kinda shopping- one for you and one for me too so everyone is happy lol.
Well, have a great day and I appreciate you taking the time to visit my blog!
Monday, November 7, 2011
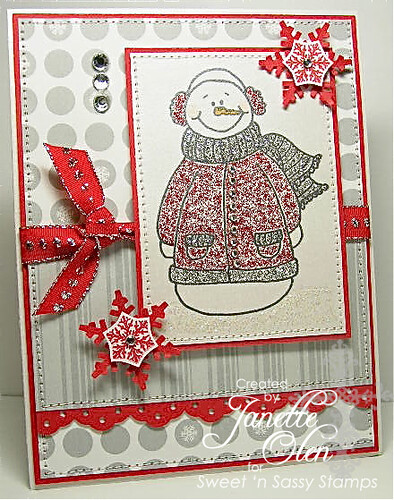
Sweet Sparkly Snowman
Hello and welcome to the Sweet 'n Sassy Stamps Birthday Blog Hop! Sweet 'n Sassy Stamps is so excited to be celebrating four wonderful years! A fantastic group of Sweet 'n Sassy Stamps design team members past and present, along with some special friends, have put together this fabulous Birthday Blog Hop to kick off a whole month of fun. We have 37 stops so the hop will take place over three days - feel free to take your time visiting each blog! You have until 11:59pm EST November 9th to leave comments on as many blogs as you can. On Saturday, November 12th Sweet 'n Sassy Stamps will announce FOUR winners (chosen at random from comments on random stops along the hop); each lucky winner will receive a prize pack including stamps, dies, paper & twine valued at $40!
If you have been following along already you should have come from Shannon White. If you are only starting here, please head back to the SNSS blog and go from there. You won't want to miss any stops along the way! Also, don't forget to comment on as many stops as you can....the more comments the better your chance of winning one of the fabulous prize packs! :)
Here is what I created for the hop
I used the snowman image from theSnow Special set and "colored" it with red, silver, and stardust stickles. I stamped 2 snowflakes from the Snowflake Flourish set and popped them up over my snowflake punches. The patterned paper is from the Echo Park Dots and Stripes Christmas paper pad. I love the little snowflakes in some of the dots of the background panel. My layout is the Sweet Stop sketch for this week. All of the edges were sewn and rhinestones were added for the buttons. This is such a sparkly card in person and my teenage daughter gave it the thumbs up lol.
Your next stop on the hop is Katlyn Traxler, but just in case there are any hiccups, here is the whole list of celebrants on this party train:
Glad you were able to stop in today, enjoy the rest of the hop!
Thursday, November 3, 2011
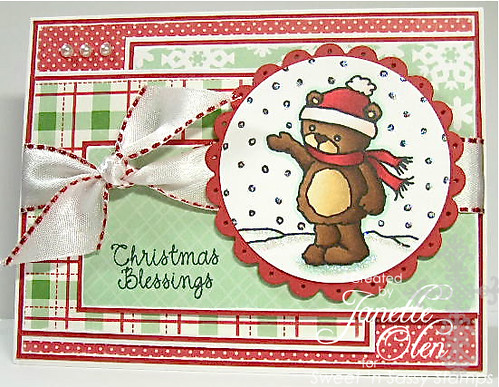
Snowy Rhubarb Christmas
Hello and welcome to the Sweet 'n Sassy Stamps Release Day Blog Hop! This month we have are doing something really fun - the Design Divas and the Digi Team are hopping together, to celebrate the fabulous clear stamps, digis, and dies being released tonight!! Grab your favorite cuppa and maybe some of that yummy chocolate the kids collected this week ;) and get ready for some amazing eye candy! Don't forget to join us tonight at 8:00PM EST in our member company forums over on Splitcoast stampers - we have a great release party planned! There will be full reveals of all of the stamp sets, digis and dies, plus challenges AND prizes!!!
If you have been following along already you should have come from Mary Faus. If you are only starting here, please head back to the SNSS blog and go from there. You won't want to miss any stops along the way!
Here is what I created for the hop
I used the new Rhubarb's Winter Fun set. I colored Rhubarb with copics and used stardust stickles for the snow. The super cute patterned paper is called Holly Jolly Christmas from Echo Park- love it! I sanded the edges of all the dp before matting and my layout is the Sweet Stop sketch for this week.
copic colors- E 23, 25, 27, 50, 51, 53; R 000, 0000, 35, 37, 39; G000
Here is a close up
Your next stop on the hop is Makiko Jones, but just in case there are any hiccups, here is the whole list of team members sharing new release goodness today:
Kim Schofield
Sandy Domelle
Ceal Pritchett
Mary Faus
Janette Olen- you are here
Makiko Jones
Kim Singdahlsen
Jessica Fick
Stephanie Wright
Dina Kowal
Holly McMillen
Carol Longacre
Taylor Usry
Cathy McCauley
Margo Smith
Bridget Finlay
Harriet Skelly
Monika Davis
Korin Sutherland
SNSS blog
Also, if you did not already know the birthday sale for this week at Sweet N Sassy stamps is 50% off all digis!!!! How awesome is that?
I would like to enter my card into the following challenge:
Charisma Cardz- Cutesy Projects
Thanks for stopping by and enjoy your day!
Monday, October 31, 2011
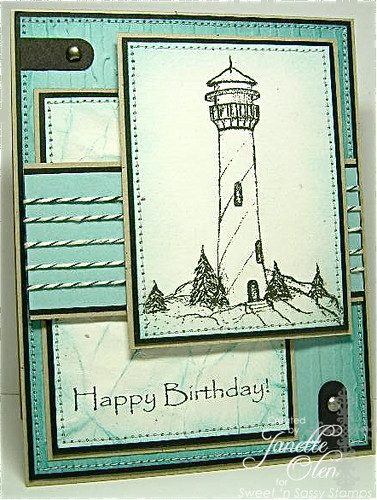
Masculine Birthday Card
Today I would like to share with you a masculine card which is not something I tend to create often. My husband needed a card for a birthday card for a friend whose party was a couple days ago. This is what I came up with:
I stamped the lighthouse image from the Shine Your Light set from Sweet N Sassy stamps onto confetti white CS with black ink then sponged around the edges with baja ink. I crinkled my white paper then sponged the creases with ink to make them stand out before stamping the sentiment over the top. The tabs are made using the word window punch and putting a brad through. The middle strip is accented with charcoal twine.
Supplies:
stamps- Sweet N Sassy stamps Shine your Light and Happy Birthdays set for the sentiment
paper- kraft, black, baja breeze, confetti white
accessories- charcoal twine, word window punch, pewter brads, sewing machine, distressed stripes cuttlebug folder, foam tape.
This Thursday, Nov. 3, Sweet N Sassy stamps is releasing 6 new stamp set along with some new dies as well. The release party is from 8-10pm EST in our forum on Splitcoast so you won't want to miss the fun. We are also having our release blog hop so I hope you will stop back on Thursday for a peek at the new sets before they are released. It is also our birthday month so lots of sales and cool events happening. You can read more about it HERE.
Well, I am off to work now. Hope you all have a wonderful day!
Wednesday, October 19, 2011
A Fall blog hop!
The design teams of Sweet and Sassy stamps and The Twinery have teamed up for a fun blog hop complete with some awesome prizes up for grabs.
I really enjoy using twine on my cards, it really adds a nice touch and is a great alternative to ribbon since it is not quite as bulky. Sweet N Sassy stamps has a wonderful variety of The Twinery twine in the store so you will want to check it out!
If you have already been hopping you should have arrived here from Sheri Twing's blog. If you are just starting here, I invite you to start back at the beginning and hop along with us!
I have 2 cards that I would like to share with you today.
The first is a card that I made during the summer for one of the SNSS kits but never shared yet- gasp!
I used the Seeing Spots set to create a strip and then I cut around the circles to create a scallop edge. I accented the card with honeydew twine.
The second card is a pretty simple Christmas card that would be easy to reproduce.
For this card I stamped the holly image from the Holly Jolly Christmas set randomly to create a background panel with green ink then used candy cane stickles for the berries. I stamped the sentiment beneath my punched border. I wrapped Maraschino twine around the border and then cinched the twine by tying a bow through my button. I love how twine looks when used on buttons!
But before you go....
Here's the wonderful prize The Twinery has up for grabs with today's hop,
the Ultimate Color Sampler Pack valued at $25....
And here's Sweet 'n Sassy's prize...
the super popular Season of Change Stamp Set (which you have seen me use a few times now) & Die Bundle valued at $28....
For a chance to win these fabulous prizes you MUST comment on each blog in the hop.
Winners will be announced on Sunday, October 23rd on The Twinery Blog as well as on the Sweet 'n Sassy Stamps Blog.
Thanks for hopping along today! I hope that you have been inspired by all of the wonderful creations that the DTs have shared.
Saturday, October 8, 2011
Fall Thank you
I made a thank you card the other day that my husband needed and I just remembered that I forgot to post it here on my blog. I participated in the Splitcoast sketch and color challenges with it.
Pretty simple and straight forward card really. I used one of the leaf images from the Season of Change set from Sweet N Sassy stamps and did the rock and roll technique using mustard and tangerine inks. The white panel is embossed with a cuttlebug polka dots folder, add some pearls to the corners and some ribbon and call it a day :)
Enjoy your weekend all!
Supplies:
stamps- Season of Change and Many Thanks sets from Sweet N Sassy
paper- soft suede, whisper white, more mustard from Stampin Up
tangerine tango ribbon
Thursday, September 29, 2011
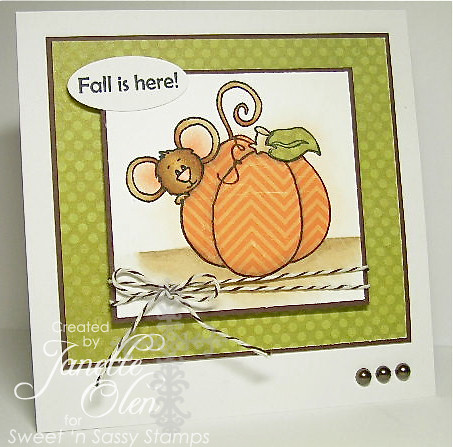
Paper Pieced Pumpkin
This week's clean and simple challenge on Splitcoast was paper piecing. I love the look paper piecing gives an image and I couldn't wait to try it on the pumpkin from the Fall Time Cocoa set from Sweet N Sassy stamps. I am happy with the way the Echo Park papers looked. Cocoa was colored with copics and baker's twine and pearls were used for my embellishments. I was tempted to add more to this card and to sew my layers but CAS was the name of the game lol. The layout is the Sweet Stop sketch for this week.
Supplies:
stamps- Sweet N Sassy stamps Fall Time Cocoa set
paper- Echo Park dp, white, chocolate chip
embellishments- brown pearls, cappuccino baker's twine
copics- E30, E31, E33, E35, E37(cocoa); R00, R02, E30 (ears); E40, E41, E42 (stem and ground); YR0000, YR000 (shadow which is not showing well in pic), W3, W1, W00 on pumpkin
Hope you have a great day!!
Wednesday, September 21, 2011
Wildflowers
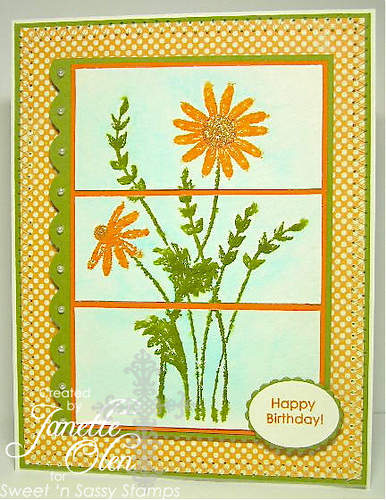
I found some time to make it into my craft room and decided to play along with the color challenge and the sketch challenge on Splitcoast.
I chose the Wildflowers stamp set for my card. I colored directly on the stamp with my Stampin Up markers in Pumpkin and Olive then spritzed the stamp with water before stamping the image onto watercolor paper. The "sky" was painted with an aquabrush dipped into turquoise ink. The center of the flowers was accented with stickles.
Supplies
stamps- Sweet N Sassy stamps Wildflowers and Seeing Spots (sentiment)
paper- watercolor, pumpkin pie, old olive, chloe's closet dp
tools- SU markers, pearls, stickles, corner rounder punch, sewing machine
Thank you for visiting today- have a wonderful day!
Wednesday, September 14, 2011
Cocoa's Christmas
Have you been enjoying the Sweet Peeks so far from Sweet N Sassy stamps? Today is Sweet Peek day 7 and the set featured today is called Cocoa's Christmas. It contains 2 adorable Cocoa images along with 6 sentiments.
I colored Cocoa with copics and used silver stickles on the garland and star. I stamped the sentiment with Black Staz-On onto my pleated ribbon. I thought that would be something new for a different look. I think it looks kinda cool. I am entering my card into the Sketch Saturday challenge this week as I used this week's current sketch for my layout.
Close up
Here is a look at the inside. I used one of the sentiments in the set along with some Michaels bridal flowers which I colored with my R37 copic marker. I then added a dot of silver stickles in the centers.
Stop on over to the Sweet N Sassy blog to see the other fabulous examples that the DT has to share with you using this new set.
Also, tomorrow night (Thurs 9/15) from 8-10 PM EST we will be having our release party located in the Sweet N Sassy forum on Splitcoast. There will be set reveals, challenges, and of course there will be some prizes up for grabs so I hope you can drop by and join us. I am one of the challenge hostesses this month but you will have to check out the release party to see what my challenge will be.
Thank you so much for visiting my blog today, have a blessed day!
Sunday, September 11, 2011
September Sweet Peeks have started!
I am afraid that I don't have a card to share with you today. We just returned from our family vacation and of course school started this week so that means no crafting time for me. However, I should be able to have some stampy time tomorrow or Tuesday but until then I want to direct you over to the Sweet N Sassy stamps blog where our DT has some wonderful peeks to show you with our new stamp sets to be released on the 15th. It is our Christmas release and there is something to appeal to everyone's tastes I think. You will find some cute, whimsical images as well as some more realistic type images.
Today is actually the 4th day of Sweet Peeks and the set being shown today is Holly Jolly Christmas. You will be able to catch up on the other 3 days on the blog as well.
See ya back here soon!
Today is actually the 4th day of Sweet Peeks and the set being shown today is Holly Jolly Christmas. You will be able to catch up on the other 3 days on the blog as well.
See ya back here soon!
Thursday, September 1, 2011
Blossom and Flourish
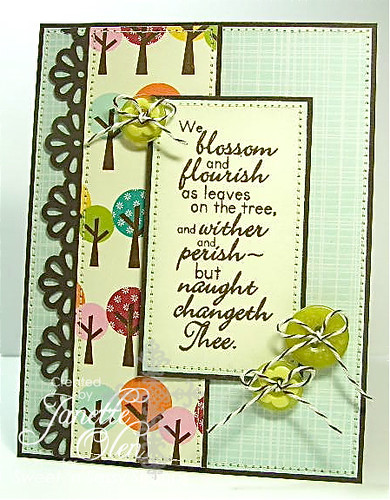
I used the beautiful newly released Season of Change set illustrated by Dina Kowal. The sentiment in the set is lovely and I chose to focus on that rather than the images for this card. I stamped the poem with dk brown ink and sponged some soft blue ink along the edges. All of my edges were stitched and I used buttons and baker's twine for my embellishments. I thought that the dp coordinated so well since part of the poem mentions "leaves on the tree". It is from the Echo Park Walk in the Park line which I don't see in the store right now but the Country Drive pack looks like it has a similar pattern.
Supplies:
Stamps- Sweet N Sassy stamps Season of Change
embellishments- buttons, cappuccino baker's twine, MS border punch
paper- Echo Park Walk in the Park, Paper Temptress hot fudge, CTMH ivory
Glad you stopped by today, have a wonderful day!!
Saturday, August 27, 2011
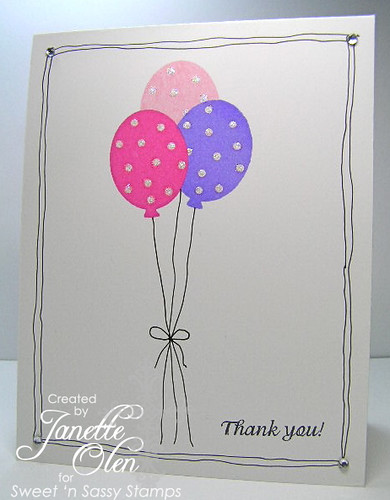
Balloon Thank you
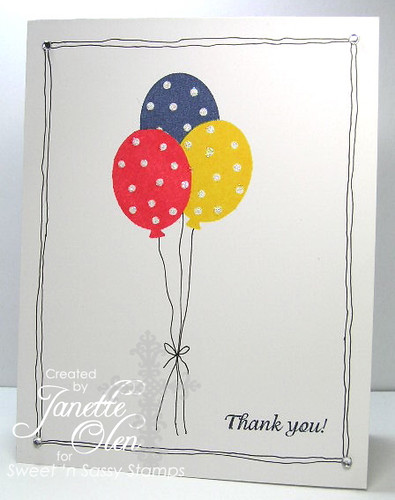
My daughter had her birthday party and she needs to thank her guests for the great gifts they gave to her. I made some very quick and easy cards for her to give to her friends. There is a "boy" and "girl" version for her to use.
This week Korin, my good friend and owner of Sweet N Sassy stamps, was chosen as the Featured Stamper on SCS so I really wanted to play along. Way to go girl! I chose to CASE this card of Korin's. I thought that it was perfect for the thank you cards we needed.
Supplies:
stamps- Sweet N Sassy stamps Polka Dot Silhouettes and Many Thanks
embellishments- stardust stickles, rhinestones, black multiliner pen
Tuesday, August 23, 2011
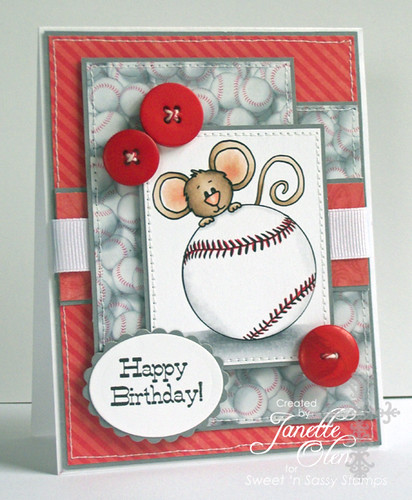
Baseball birthday
We have had so many birthdays to celebrate this summer between family and friends. I originally was going to give this to my husband but he was invited to a party for a friend of ours and I did not have any cards in my stash to give him- gasp!
I used the Cocoa loves baseball digi and colored him with my copics. I stitched the edges and used some baseball patterned paper that I have had in my stash for quite some time along with Echo Park dp. Buttons with baker's twine are used to accent the card. The sentiment is from the Happy Birthdays set which has a terrific variety of "Happy Birthday" sayings- both vertical and horizontal.
I colored this image quite awhile ago but here are the copic colors I believe that I used: R000, R00, R02, E41, E42, E43, E44, W00, W1, W3.
Thank you for stopping in today and have a blessed day!
Monday, August 15, 2011
Season of Change
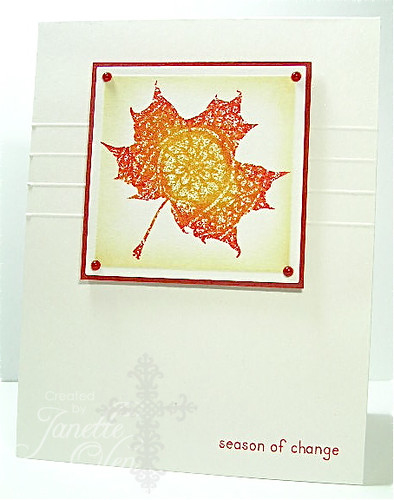
Today the THE day!!! The August release from Sweet N Sassy stamps that is. There are 8 fabulous sets that are going to be released tonight after the release party. It is the last day of Sweet Peeks and the featured set is called Season of Change. It is designed by our new illustrator Dina Kowal. I think that you are going to love it! Check out my CAS sample card below.
I used one of the gorgeous leaf images in the set and did the "rock n roll" technique on it. I used mustard, tangerine, and riding hood red inks from Stampin UP. I really love the pattern within the leaf. Isn't it cool? I wanted to call some attention to the image so I scored 4 lines behind it to accent.
Stop on by the Sweet N Sassy blog to see some other samples created by the awesome DT.
Some more exciting news...Sweet N Sassy stamps has joined the Splitcoast community as a member company today!!!! We are full of exciting news huh? There is another exciting announcement but I will have to keep that a secret until tonight and you can hear about it at our release party lol :)
Thanks so much for stopping in and please join us at 8pm for the release party which is going to be held in our forum on SCS:
Fabulous Fall Release Party
Friday, July 22, 2011
Quick and Easy Birthday
Today I would like to share a quick CAS card that I made for a birthday party that we are going to for a 6 year old boy. I used the new Seeing Spots stamp set from Sweet N Sassy stamps.
I used 4 of the images from the set and used 4 inks as well to create this fun and colorful border. I tied some green twill ribbon at the top and added the sentiment which is from the Happy Birthdays set at the bottom.
Thanks for looking and hope you have a great weekend!!
I used 4 of the images from the set and used 4 inks as well to create this fun and colorful border. I tied some green twill ribbon at the top and added the sentiment which is from the Happy Birthdays set at the bottom.
Thanks for looking and hope you have a great weekend!!
Friday, July 15, 2011
Bring on the Bling
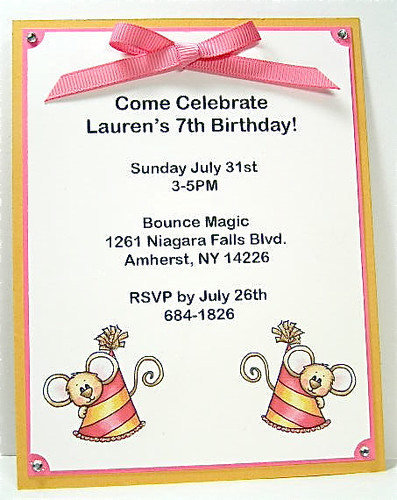
Wow, summer sure seems to be flying by for my family and quite busy too. August is birthday month for us as 2 of my daughters and my husband all celebrate their birthdays within 9 days of each other too. I would like to share the invitation that I made for my youngest daughter's birthday party today.
The challenge on the Sweet N Sassy digi challenge blog is to bring on the bling which fits so perfectly for my daughter who likes everything that sparkles.
I used the precolored Party Hat Cocoa for the invites and sized them down to 1.5 inches as well as flipped the image so that there would be mirrored images in each corner. This is an awesome advantage to using digis- the fact that you can make them any size (I have even printed them out very large so my daughters used them as a coloring page) and that you can rotate them etc. I used photoshop to do this and then typed in the text using the same program. Having the precolored image also saves loads of time especially when you need to create a large quantity of the same card. So, for my bling...I used a ticket corner punch and added a rhinestone to the corners, and used diamond stickles on the trim of the party hats. My invites are flat, meaning that it does not open up like a card.
I hope that you will decide to give making your invitations a try for your next party/gathering. It really can be quick and easy. I will be making invites that I will share with you for my oldest daughters birthday in the near future also.
I am off to swimming lessons now, hope you have a great day!
I
Wednesday, June 29, 2011
July Release Sweet Peek Day 5
Today is the 5th day of Sweet peeks leading up to Friday's release. The set being featured today is Reading Bethany. This little bunny is so cute.
I colored Bethany with copics and added some stickles to the bow, butterfly, and flower. The bright cheerful papers are from Echo Park's Summer Days and Splash collections. I used the Sweet Stop sketch for this week as my layout. I am planning on sending this card to my friend Kim who loves to read thanking her for letting my family come and stay with them this past week. I hope she likes it.
Be sure to stop by the Sweet N Sassy blog to see the rest of the wonderful creations that the DT has to share.
Thanks for stopping by and have a wonderful day!!!
Sunday, June 26, 2011
July Release Sweet Peek Day 2
Sweet N Sassy stamps is excited to be releasing 6 fabulous new stamp sets on July 1st. For 6 days prior to the release there will be Sweet Peeks of one new set each day. Today is the second day of Sweet Peeks and we are featuring the cool new Seeing Spots set. What a fun set perfect for creating backgrounds or CAS cards. I am telling you with the insanely busy schedule my family has I am really migrating toward creating simple but stylish cards.
Today's card is a perfect example- very quick and easy to create but not lacking on style. I hope you think so too. Take a peek.
I used some of Echo Park's awesome designer paper in the Dots N Stripes collection. In the center of the polka dots I stamped either "I Love You" or the heart circle in the center of it. So, what a quick and easy card, all I did was dress up the patterned paper to make it my own.
Be sure to stop by the Sweet N Sassy blog to see the rest of the sweet peeks that the design divas have to share.
Sunday, June 12, 2011
You're a Star!
Well, I have certainly been neglecting my blog here for sure. Almost 2 weeks since my last post, oh brother! I imagine that many of you too have been busy with the last couple weeks of school and the wind down of childrens' activities.
The card I am sharing with you today, I made for a boy whose party my daughters were invited to a couple weeks ago. It started out as a Father's day card but then I realized we needed a card for the party and I added the sentiment which I thought was fitting for a 7 yr old boy.
I colored my Cocoa's Baseball Hat digi with copics, cut it out and adhered with foam tape. I have to admit that I originally had no plans of cutting out the image but unfortunately I oversaturated my paper while coloring and the red bled quite badly over the lines. Red is a tough color to push back with the blender pen and I did try but it was too much to correct so out came the scissors lol. The edges were stitched and buttons and star dies were used as embellishments. I also used some red and white Baker's twine which is now available in many colors from Sweet N Sassy stamps- woohoo!
Supplies:
digi stamp- Cocoa's baseball hat from Sweet N Sassy stamps
sentiment- Happy Ocean Friends set from SNSS
Baker's twine
Star Nesttabilities
buttons
Copics- W00, W1, W3, W5, R24, R27, R29, R59, R00, R02
Sunday, May 29, 2011
Fishing you...
Today is the 4th day of our Sweet Peeks getting ready for the Sweet N Sassy stamps release on June 1. The set we are previewing today is called Happy Ocean Friends.
This set is so stinkin cute. I love it because I am going to be able to create some really easy CAS cards. This is exactly what I did with my card today. I stamped the fish, colored it with copics, and added some stickles.
Be sure to stop by the Sweet 'n Sassy Stamps blog to see what other lovely creations the DT has to share with you featuring this adorable new set.
Also, remember till tomorrow, Monday, May 30th, all of Sweet N Sassy stamps clear and digital stamps are 15% off with coupon code MEMDAY11.
Thank you and have a Happy Memorial day to all my American friends!
Saturday, May 28, 2011
Sweet Peek Day 3
Today is the 3rd day of our Sweet Peeks getting ready for the Sweet N Sassy stamps release on June 1. The set we are previewing today is called Beauty by the Sea.
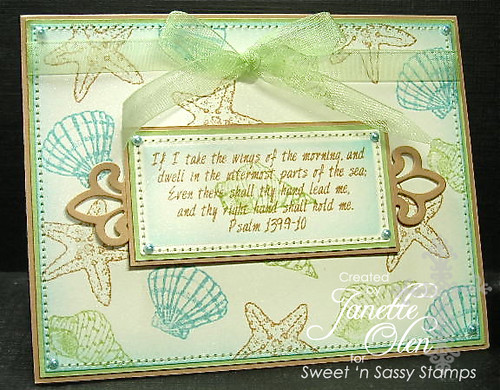
I created the background panel by stamping 3 different shells in caramel, baja, and celery ink onto some cryogen white cardstock. I then sponged and sewed the edges.
For the focal image I stamped the scripture with caramel ink, stamped the shell over top of the scripture with celery ink and then sponged baja ink around the verse while the die was still in the nestabilities.
I love the seashells images and sentiments included in this set. The whole set is so serene. I think it is going to be great for creating some beautiful cards and I believe you will think so as well.
Be sure to stop by the Sweet 'n Sassy Stamps blog to see what other lovely creations the DT has to share with you featuring this beautiful new set.
I also want to mention that now through Monday, May 30th all of Sweet N Sassy stamps clear and digital stamps are 15% off with coupon code MEMDAY11.
I will be back again tomorrow with a sweet peek of another set for you. Thanks for dropping by and hope to see you back tomorrow!
Thursday, May 19, 2011
Love You Forever
Wow, it sure seems like forever since I have made a card and since I have posted here on my blog. I have been working some more hours and it is temporary so I am trying to do what I can before the time is no longer available. Anyway, I took a little time to make a card today for my husband. It was our anniversary last week and I never even had a chance to make one for him. So this is going to be a surprise just because card. I hope he likes it (and you too).
I printed the sentiment which is from the Love Sentiments digi set from Sweet N Sassy stamps on my computer. The heart is from the Polka Dot Silhouettes set and it was stamped then cut out and adhered with foam tape. The dp is from the Mistletoe collection from Close to my Heart. The card measures 5 inches square.
The layout is the Sweet Stop Sketch this week.
Sunday, May 8, 2011
CAS note card sets
Hi everyone and Happy Mother's day to all the moms out there. I hope that your family has been good to you and that you are enjoying your day. I am excited because we finally have some sunshine here in Buffalo and as a matter of fact, we had 2 sunny days in a row! Small victories, ya know lol.
Anyway, I would like to share 2 very simple and easy note card sets that I originally made for my daughters to give to their school teachers. I got the idea after making one and then thought since there are 4 images in the stamp set that it would be a great set. I used my beloved Serene Silhouettes set from Sweet N Sassy stamps for them. I hope you like them.
Here is the first card that idea came from:
Here is the first set
To create these cards I made a stencil by using my oval nestabilites to cut an opening out of acetate. I then sponged ink in 4 different colors using the stencil and stamped the image with brown ink in the center of my sponged oval. I added a sentiment, rounded the bottom right corner, and finished with brown satin ribbon.
The second set:
I did the same sponging as in the first set but stamped the images in black ink instead. I chose to keep this set even simpler by not adding ribbon or rounding the corner.
I also made a sympathy card (not as part of a set)
I think that they will make nice easy gifts for the teachers or anyone else for that matter. I hope that I was able to give you some ideas and inspiration today.
Thank you for stopping by- God bless!
Saturday, April 30, 2011
Tea time Sweet Peek
Tomorrow Sweet N Sassy stamps will be releasing 6 new stamp sets. For the past 5 days the DT have been sharing "sweet peeks" on the SNSS blog. If you have not seen them yet, I encourage you to visit the blog to check it out.
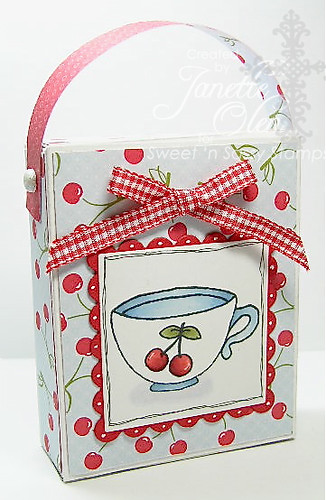
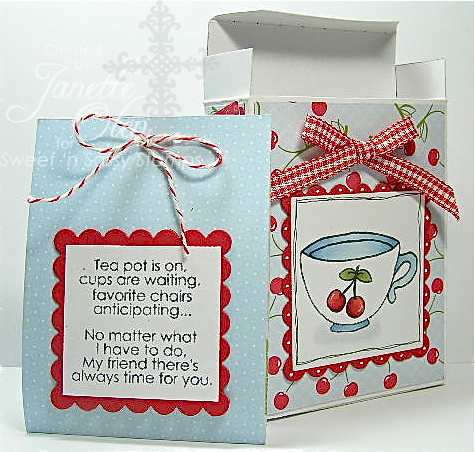
Today, I am sharing a peek of an adorable new set called Tea Time. I used the tea cup image, an accessory image, and a sentiment.
I created a tea bag box holder using a free template from My Time Made Easy called Cutesy Cover. I did slightly alter it.
I also covered a tea bag with some dp and added the sentiment. The box will fit about 2 covered bags or 4-5 uncovered.
Supplies:
stamps- Sweet N Sassy stamps Tea Time
SU dp
white shimmer brads
copics- R24, R29, R89, YG93, YG95, B91, B93, B95
twine
gingham ribbon
square nesties
Thank you for visiting today. Don't forget to stop on by the Sweet N Sassy stamps blog for some more sweet peeks. Have a great day!
Today, I am sharing a peek of an adorable new set called Tea Time. I used the tea cup image, an accessory image, and a sentiment.
I created a tea bag box holder using a free template from My Time Made Easy called Cutesy Cover. I did slightly alter it.
I also covered a tea bag with some dp and added the sentiment. The box will fit about 2 covered bags or 4-5 uncovered.
Supplies:
stamps- Sweet N Sassy stamps Tea Time
SU dp
white shimmer brads
copics- R24, R29, R89, YG93, YG95, B91, B93, B95
twine
gingham ribbon
square nesties
Thank you for visiting today. Don't forget to stop on by the Sweet N Sassy stamps blog for some more sweet peeks. Have a great day!
Wednesday, April 27, 2011
April showers bring May flowers
The challenge for the next 2 weeks on the 7 kids challenge blog is April showers bring May flowers so you get to choose either showers or flowers for your creation. The prize for a random participant is a $20 gift certificate to the 7 kids college fund store.
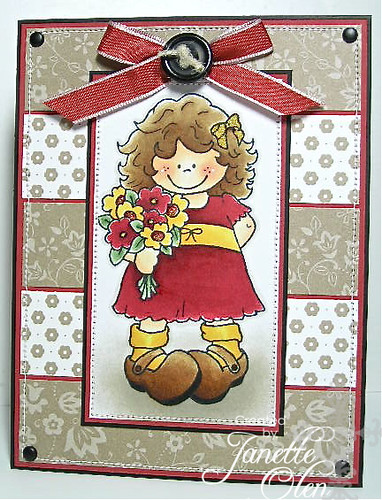
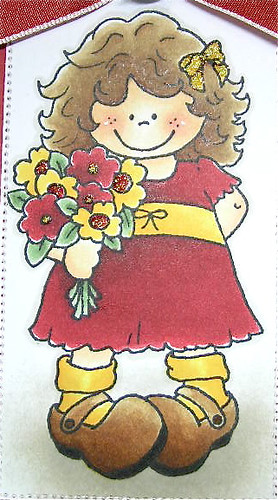
I went with a flowers theme for my card. This super sweet image from High Hopes is called Little Missy. I colored her with copics and added diamond stickles to the center of the flowers and the bow.
What could you spend your gift certificate from 7 kids college fund on? Perhaps...
New Penny Black stamps that just arrived in the store
New collections from Crafters Companion like Flower Fairies or S.W.A.L.K
Belles and Whistles brand new Fairy Friends collection or the super cute Sweet Art Girls
All Zva Creative products on clearance till April 29 using code ZVACLEARANCE25
Supplies:
high hopes little missy stamp
copics (R46, R39, Y15, Y17, E00, E50, R20, E31, E33, E37, W1)
diamond stickles
black brads
CS- riding hood red, black, red, kraft dp from Stampin Up
taffeta ribbon from Stampin Up
I hope that you will be able to join us and play along with the challenge at 7 kids. We would love to see what you create!
Sunday, April 24, 2011
Elegant Blessings
Happy Resurrection Day everyone! I hope that your day will be filled with joy as we celebrate the rising of our Lord Jesus Christ. Praise the Lord, He is risen!
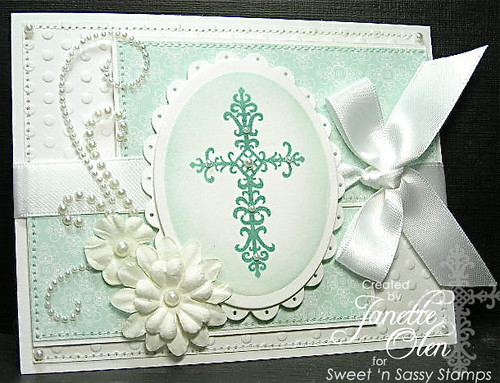
My card today uses one of Sweet N Sassy stamps older sets called Elegant Blessings. I thought that with it being Easter today it was particularly fitting. However, the set has 2 cross images and 11 sentiments so it is definitely great for other occasions besides Easter. I used the smaller cross from the set on my card. I sponged ink around the image and added small pearls to accent it.
Supplies:
stamp- Elegant Blessings from Sweet N Sassy stamps
Papertrey dp
PTI aqua mist ink and CTMH Juniper ink
white pearls and pearl flourish
white satin ribbon
Oval nestabilities
paper piercer
Again, Happy Easter to you all and I hope that you are surrounded by family, friends, and most of all God's abundant love on this Resurrection Sunday! Thank you for sharing a part of it with me!
Sunday, April 17, 2011
Many blessings
It's that time of the month, that is time for the Sweet N Sassy stamps customer blog hop. The theme for this month is birthdays- easy peasy right? I did want to get my card posted sooner but the weekend kind of got away from me.
I created a sunset scene for my card using my favorite set from Sweet N Sassy stamps called Serene Silhouettes. I sponged ruby red, pumpkin pie, and summer sun ink for the sky. Using my scor-pal, I created an embossed diamond pattern on the bottom panel. The paper was turned on the diagonal and scored at 1/2" intervals. I hope you like it.
Stop by the Sweet N Sassy stamps blog to see all the details for the birthday blog hop. There are lots of awesome blogs to inspire you.
Supplies:
stamps- Serene Silhouettes and Poppies and Greetings (sentiment)
cryogen white paper
labels 8 nestabilities
black rhinestones
SU ink- ruby red, pumpkin pie, summer sun
Martha Stewart lattice border punch
black satin ribbon
scor-pal
Subscribe to:
Posts (Atom)